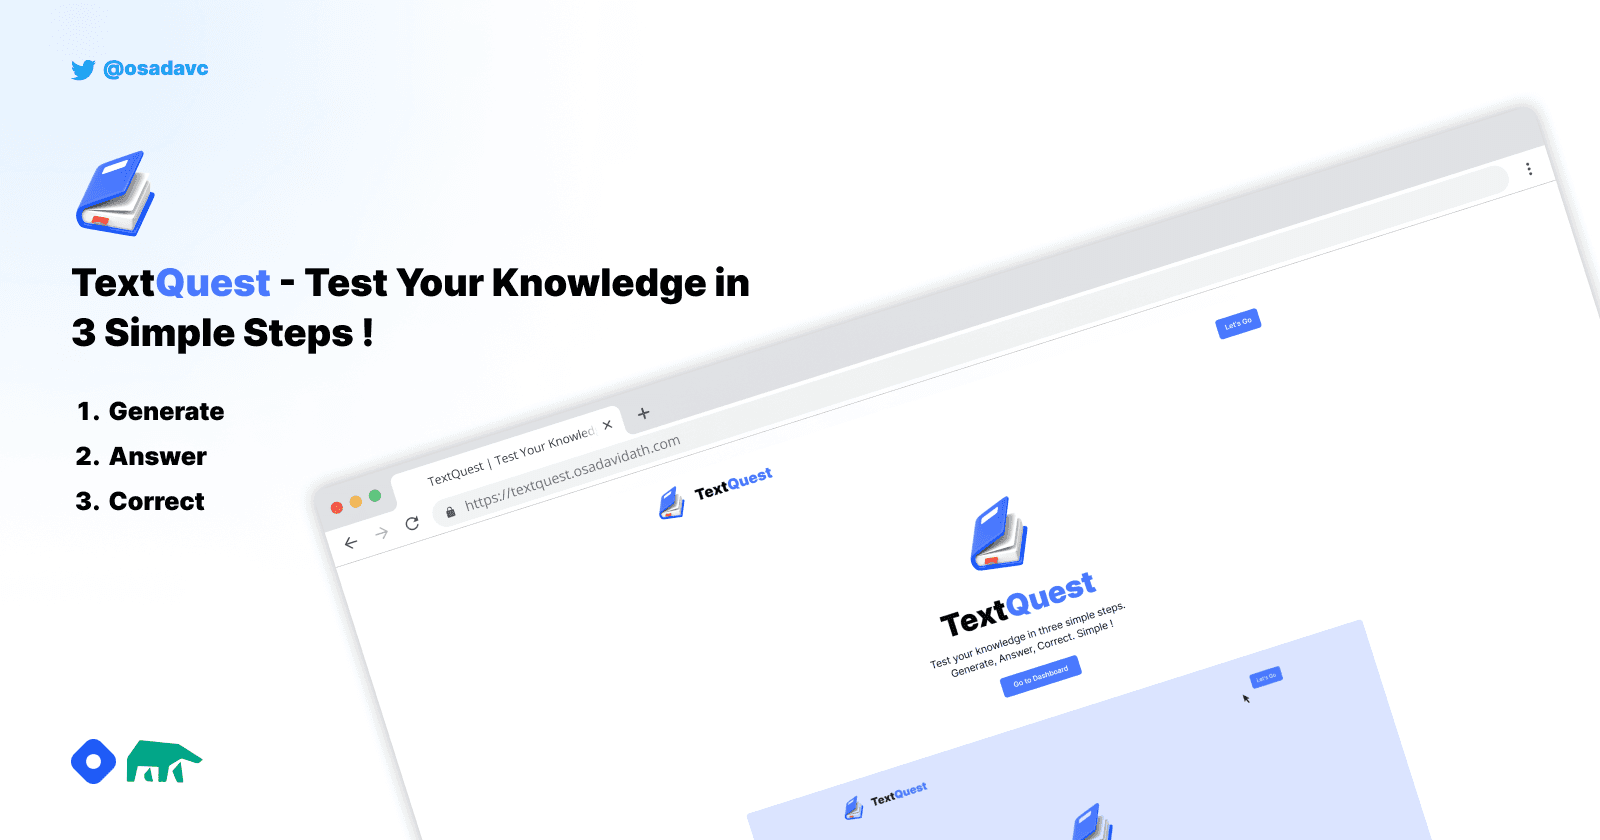
My Experience in Building TextQuest, an AI-Powered Platform to Test Your Knowledge with MindsDB
Measure your knowledge of subject matter quickly and easily with the assistance of AI
10001₂ year old curious human being building stuff
Introduction
TextQuest is a platform powered by AI that aims to solve a common problem students, including myself, face. Before diving into the project details, let me explain the problem and how this platform intends to provide a solution. As someone who prefers to tackle day-to-day issues through my projects, I believe TextQuest will be a helpful solution to all the students out there who struggle with studying.
If you're a student who spends most of your time studying loads and loads of textbooks, you might have noticed that you tend to forget things quickly. Now, there are many ways to minimize this problem, but in my opinion, one of the best ways is to make questions from the specific text and try to answer them yourself.
Well, even though this is one of the best ways to study your text material. This is an incredibly time-consuming process, you have to form questions from the text and try to answer them.
That whole process will be a lot easier with TextQuest because it generates the questions automatically with the help of MindsDB and OpenAI APIs by looking at your text.
How TextQuest Works
Before we talk more about how this works, I highly suggest you watch the video below to get a rough understanding of TextQuest and how you can use it.
Once you have logged in to TextQuest via Google,
Upload a textbook (or any PDF with text in it) and select the page which you want your questions to be generated from.
Choose the number of questions you need to generate.
and boom, after a few seconds you will see all the questions that were just generated with AI.
Now you can select the answers and click on the Check Answers button to verify your answers.
Under the hood, this uses the GPT 3.5 turbo model via the OpenAI handler that MindsDB comes with. I will get into more detail about the MindsDB integration in a later section of this article.
With that clear idea about how TextQuest works, let's move on to more technical details.
My Tech Stack
As always, I used my go-to tech stack for this project which is
NextJS as the frontend Javascript framework (with Typescript)
TailwindCSS for utility class-based CSS styling
PostgreSQL and Prisma for the database
with the interesting addition of MindsDB to consume data from OpenAI APIs. Also, I used shadcn ui as the component library.
Technical Walkthrough
This section includes all the technical information of TextQuest and how you can set it up locally if you want to try it out yourself (The project is not hosted live as of now)
Setting up MindsDB
Since this project uses the facilities provided by MindsDB, I first had to install MindsDB locally on my computer. (unfortunately, the MindsDB cloud version is unavailable as of now)
I followed the instructions in the official MindsDB documentation to get MindsDB up and running. The Troubleshooting section was quite helpful in solving many issues that came up. (For some reason, I could only get it working with the pip from source installation method, so if you're facing some errors, maybe give it a try)
Connecting MindsDB to OpenAI
The next task on the list is getting access to OpenAI models from MindsDB, to do this I first had to install the OpenAI handler to MindsDB with the following command.
pip install .[openai]
Now that I had the OpenAI-related packages installed, I had to create the ML Engine and the Model from the MindsDB dashboard, to do this I opened the MindsDB dashboard which is hosted in http://localhost:47334 and ran the following commands to create them.
Creating ML Engine (OpenAI)
CREATE ML_ENGINE openai_engine
FROM openai
USING
    api_key = 'YOUR_API_KEY';
This engine will be used when you make calls to OpenAI APIs in the future, make sure to replace YOUR_API_KEY with a proper OpenAI API key.
Creating Model
To start consuming data from the backend of our application, you need to create a model inside of MindsDB.
CREATE MODEL mindsdb.question_generator
PREDICT questions
USING
    engine = 'openai_engine',
    model_name = 'gpt-3.5-turbo',
    prompt_template = 'Answer in JSON (json array named questions with each object having question, 4 answers and the actual answer. The key of actual answer should be "correct_answer"). All the questions SHOULD only have ONE CORRECT answer. Generate {{question_amount}} {{question_type}} questions (all the answers in mcq questions should be full) from the following text. IGNORE the sections {{exceptions}}. \n\n {{page_content}}. Ask questions other than {{ignore_questions}}. Only ask questions which are answerable by the given text',
    max_tokens = 3000;
You can see that I've named this model as "question_generator" in the first line, this is how we will refer to this model in the future.
In the engine parameter, the ML Engine's name will be inputted.
In the model_name parameter, I have defined the OpenAI model that is being used. I am using the gpt-3.5-turbo model, while you can use any model such as a gpt4, I find that gpt-3.5-turbo is the perfect match considering cost and performance.
The most important part of this query is the prompt_template parameter, this is basically where you define all of your instructions to the model. If you have read through this, I have instructed the model exactly how to generate questions and also you can notice that I have specified 5 variables, let's go over each of them and explain how each of these works.
question_amount - Exactly as the name says, this is just the number of questions that I want to generate through a particular call.
question_type - Right now, this variable only accepts the value mcq, this is kept as a variable to support more question types in the future (eg: long answer questions, short answer questions).
exceptions - This variable supports an interesting addition for this application which is ignoring whole sections of the text for the question generation process.
page_content - The content that is used for generating questions, it is the text in the textbook page in this scenario.
ignore_questions - If you generate questions again from a page you have already generated questions from, the previously generated questions will be passed into this variable for the AI to not make the same questions again.
Handling PDFs from the Application
Now that the MindsDB part is completely configured, all I had to do was create a frontend and backend to read PDFs and call the MindsDB model with the page data.
First of all, I used Uploadthing as my storage bucket, so every PDF that the users upload will be stored there.
Since it is not feasible to feed the whole book to the GPT model because of the cost and speed concerns, I decided that letting the user choose what page they need the questions generated from is the best solution for this.

So here is what I came up with, a sliding panel to display the PDF and let the user choose the page that they need to generate the questions from. I managed to display the PDF with some react-pdf magic. It was a little buggy but I managed to get it to work flawlessly by downgrading the react-pdf version to 6.2.2 (A little tip if you're planning to work with react-pdf in the future)
Then once the user hits the Generate question button with the number of questions that they need, in the backend I load the PDF file again to read the content in that specific page of the PDF file and format them properly. I had to create a function myself (using some of the open-source code I found on GitLab) to do this because none of the out-of-the-box solutions was working properly. You can find my custom utils in my GitHub project here.
Feeding the Data to OpenAI via MindsDB
Then, I used the mindsdb-js-sdk package from the NextJS API routes to call the previously created model like this (When a user requests a generation)
const model = await MindsDB.Models.getModel("question_generator", "mindsdb");

const queryOptions = {
  where: [
    `page_content = "${pageContent}"`,
    `question_amount = "${numberOfQuestions}"`,
    `question_type = "${questionType}"`,
    `ignore_questions = "${samePageQuestions}"`,
    `exceptions = "${processedExceptions}"`,
  ],
};

const questions = JSON.parse(
  (await model?.query(queryOptions))?.value.toString() ?? "",
).questions.map((item: QuestionItem) => ({
  ...item,
  // To support answers like all of the above
  answers: [
    ...shuffleArray(item.answers.slice(0, 3)),
    ...item.answers.slice(3, 4),
  ],
}));
After I have gotten the questions and answers from the GPT request, you can notice that I have done some processing before saving them to the database, basically what I have done here (with reasons) are,
Shuffle the MCQ answers list - gpt3.5 tends to always make the correct answer the first answer in the list.
While making sure the last answer stays the same - To support some answers like "All of the above".
After all of the processing is done, I save them to the database and send them back to the client for the user to see.
Correcting User's Answers
This is the final step in the process which is also an extremely trivial task. In a separate API route which is called when the user clicks on the Check Answers button, I have this code where it simply throws the user's answer into the database.
const result = await prisma.$transaction(
  questionIdList.map((item) =>
    prisma.question.update({
      where: {
        id: item,
      },
      data: {
        userMCQAnswerIndex: pageAnswers[item],
      },
    }),
  ),
);
Now, this may not look like much but since we have the correct answer's index saved in the database, from the frontend we can compare the two answers and render it according. (In this case green border for correct answers and red border for wrong answers)
Here is the code relavant to correct and wrong answers being displayed.
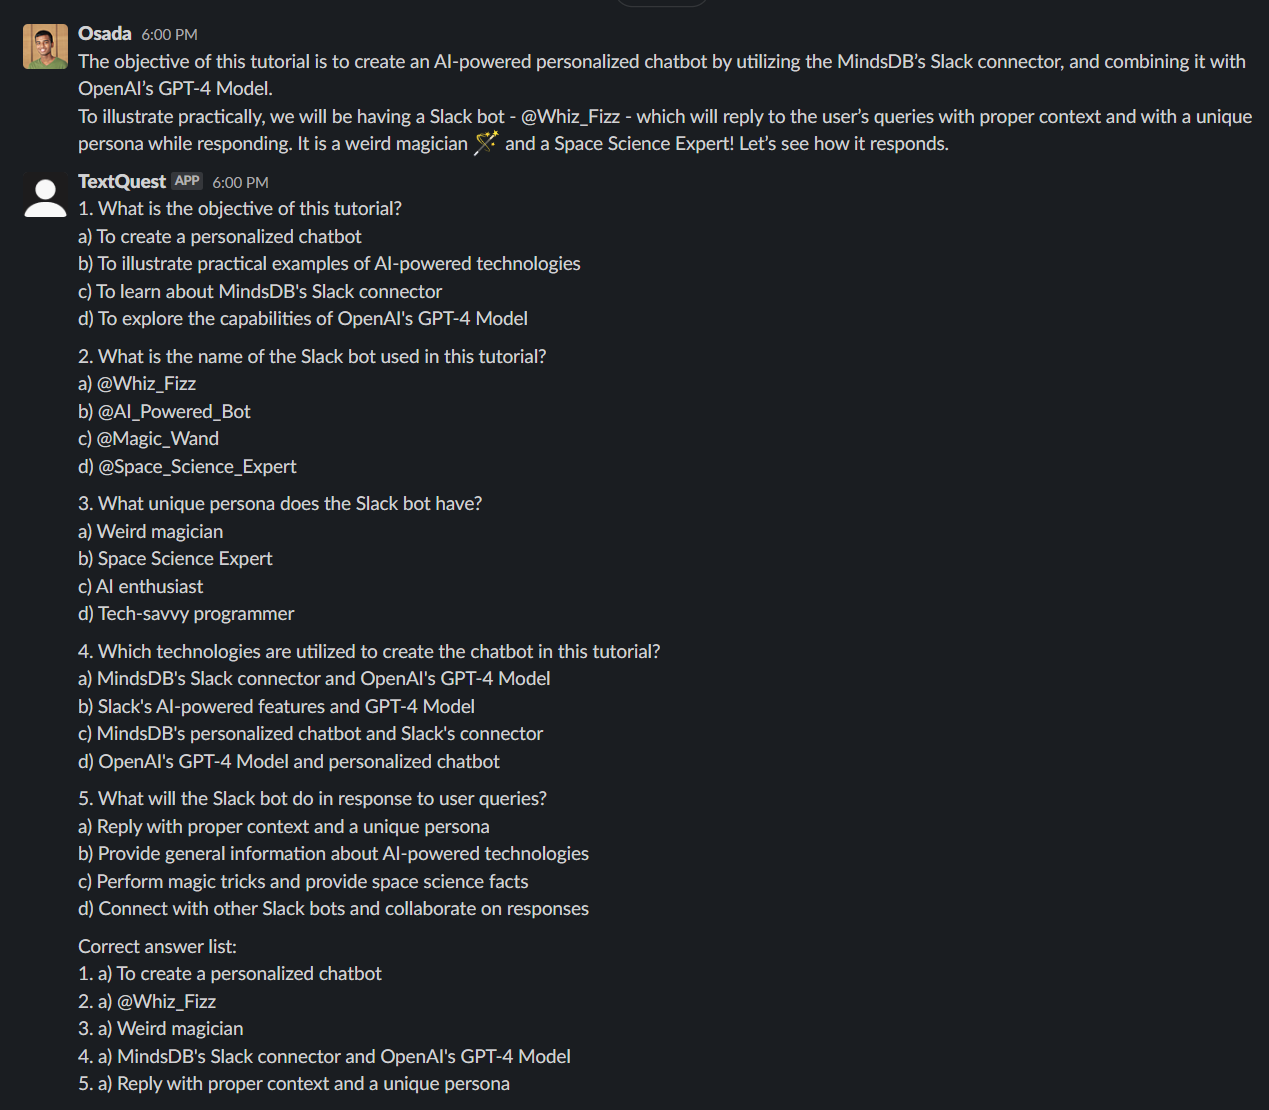
Slack Bot
TextQuest is not limited to the web interface. At the same time, you can also access the main TextQuest feature through a Slack Bot as well. Yes, you heard that right. You can access it through a Slack bot.
This Slackbot works through a MindsDB Job. Let me go over how this works and how you can set it up locally.
Initializing Slack In MindsDB
First, we have to connect Slack to our MindsDB instance. You can find all the details on how to do that here in their documentation. Make sure to follow the second method as that's how we will connect to Slack.
You can initiate the connection by running this SQL statement in the MindsDB editor.
CREATE DATABASE mindsdb_slack
WITH
  ENGINE = 'slack',
  PARAMETERS = {
      "token": "MY_SLACK_TOKEN"
    };
Make sure to replace the Slack token according to the instructions in the documentation.
Creating OpenAI Model
Now that we have our Slack instance ready, we can create the OpenAI model to do the actual generation of questions.
CREATE MODEL mindsdb.slack_question_generator
PREDICT response
USING
    engine = 'openai_engine',
    model_name = 'gpt-3.5-turbo',
    prompt_template = 'Generate 5 MCQ Questions from the below text. Each question must have 4 choices and the correct answer. The correct answer list should be included at the end. Only ask questions which are answerable by the given text \n\n {{text}}',
    max_tokens=3000;
This model is pretty similar to the model we created before when creating the web interface but this is much simpler because we are just requesting 5 questions from the text.
You can test it out by running the following SQL statement if you want.
SELECT response FROM mindsdb.slack_question_generator WHERE text = 'Text to generate questions'
Creating the MindsDB Job
Finally, we create a MindsDB job for this to keep running and check for new messages and respond every minute.
CREATE JOB mindsdb.slack_question_generator_bot AS (
  INSERT INTO mindsdb_slack.channels(channel, text)
    SELECT
        t.channel as channel,
        t.text as input_text,
        r.response as text
    FROM mindsdb_slack.channels as t
    JOIN mindsdb.slack_question_generator as r
    WHERE t.channel = 'general' AND t.created_at > "2023-07-25 05:22:00" AND t.created_at > "{{PREVIOUS_START_DATETIME}}"
    LIMIT 1;
)
EVERY minute;
If everything is correctly configured, once you send a text to the general chat (or any chat you have set up), it should respond with 5 MCQ questions and their answers at the bottom. Pretty efficient for a quick recap in my opinion.
Slack Bot For Administration
Before I wrap up this project, I wanted to play around with the MindsDB agents as well. So I built sort of an assistant for the Text Quest admin to monitor this application.
Conversational LLM Model
Before creating a MindsDB agent, a conversational model to access the LLM that we're going to be using should be created (Make sure to replace your gpt3.5 API key)
CREATE ML_ENGINE langchain
FROM langchain

CREATE MODEL mindsdb.text_quest_db_inspection
PREDICT answer
USING
    engine = 'langchain',
    input_column = 'question',
    api_key = 'API_KEY_HERE',
    model_name = 'gpt-3.5-turbo',
    mode = 'conversational',
    user_column = 'question' ,
    assistant_column = 'answer',
    prompt_template='Answer the user input in a helpful way';
Connect Database
If you've already read the rest of the article, you know that I used PostgreSQL, so I am going to connect my PostgreSQL instance to MindsDB
CREATE DATABASE agent_db
WITH ENGINE = "postgres",
PARAMETERS = {
    "user": "postgres",
    "password": "PASSWORD_HERE",
    "host": "HOST_HERE",
    "port": "5432",
    "database": "postgres"
};
Creating the Skill and Agent
Once you've created the model and connected the database, you can proceed to create the skill and the agent as follows.
CREATE SKILL text_to_sql_skill
USING
    type = 'text_to_sql',
    database = 'agent_db',
    tables = ['User', 'Textbook', 'Question'];

CREATE AGENT text_to_sql_agent
USING
    model = 'text_quest_db_inspection',
    skills = ['text_to_sql_skill'];
Notice the tables property here, I am going to include the names of all of my tables so that they can be accessed from my chatbot.
Creating the Chatbot
Now that everything is ready, all that's left to do is create the actual chatbot. You can follow the instructions in the MindsDB documentation to connect Slack and the following query to create the chatbot.
CREATE CHATBOT text_to_sql_chatbot
USING
    database = 'mindsdb_slack',
    agent = 'text_to_sql_agent',
    enable_dms = true,
    is_running = true;
Then inside the Slack DM with the bot, you can ask questions like "How many users are registered" and the bot will happily answer it for you!
Linting & Code Quality
As always, I used ESLint and Prettier for linting and keeping the code nice and formatted. I also used the prettier plugin @trivago/prettier-plugin-sort-imports to keep the import statements ordered which I think looks very clean.
Future Plans
I built this project with upgradability in mind so I am planning to add a lot more question types to the application and make the experience more gamified.
Self Deployment
Even though I would love to host this application and provide a link for you to try out, unfortunately, that's not possible due to MindsDB cloud being currently unavailable.
Feel free to take a look at the code in this repository - https://github.com/osadavc/textquest and contact me on Twitter (X) if you have any doubts regarding self-hosting, I will be very happy to guide you through the whole process.
Before wrapping up the article, I would like to thank Hashnode and MindsDB for providing this opportunity to build an amazing product.
Finally, thank you so much for reading the article, I hope this project will help you a lot if you're a student and if you have any comments I would love to hear them down below in the comments.