Schedule Cron Jobs Easily And Conveniently With Agenda
10001₂ year old curious human being building stuff
When it comes to building serious applications, at some point you'll need to schedule some cron jobs. It might be to send a scheduled email, schedule to tweet something or even schedule to post something.
There is a handful of ways you can achieve something like that but today we are gonna take a look at my favourite which is the Agenda library.
Introduction 🎉
Agenda is a lightweight job scheduling library for Node.js as they say on their ReadMe. By using agenda you can create, manage cron jobs. It also allows you to use a MongoDB database to store your jobs so that your cron jobs will be persisted even if you restart the server.
Getting Started ✨
First, initialize a node project with npm init -y or yarn init -y. Then you will need to install a couple of dependencies. We will need Express, Agenda and DayJS. I will explain what each of them is for later. For now, just install them with npm install express agenda dayjs or yarn add express agenda dayjs.
I am gonna use import syntax for the rest of the tutorial. If you also need to use important statements make sure to add
"type": "module"to your package.json file
In the index.js file, you can import all of your modules and initialize an express app like follows.
import express from "express";
import Agenda from "agenda";
import dayjs from "dayjs";

const app = express();
Make sure to listen to a specific port at the bottom of your file. In this case, I am gonna listen on port 3000.
app.listen(3000);
Then you can initialize an Agenda instance and pass the database connection URL and the collection name. I am gonna pass my local MongoDB database URL and the collection name is agendaJobs. You can choose whatever name you want.
const agenda = new Agenda({
  db: {
    address: "mongodb://localhost:27017/agenda-test",
    collection: "agendaJobs",
  },
});
Then you need to start the Agenda instance. To do that update your express listen statement like this.
app.listen(3000, () => {
  agenda.start();
});
It will start the agenda instance once express initialized and it is listening on the specified port. Now express and agenda are fully configured and ready to go.
Scheduling Jobs ⚒️
Before scheduling a job, you need to define a job. This definition includes what the job does when it is called. You can define a job as follows.
agenda.define("doSomething", (job) => {}
You can give any name to your job. This name will be important when you want to schedule it. For now, I am gonna console log something when the job runs.
agenda.define("doSomething", (job) => {
  console.log("Job Ran");
});
Now you need a way to test this out. For this, I am gonna create an express endpoint.
app.get("/", async (req, res) => {
  const data = await agenda.schedule(
    dayjs().add(5, "seconds").format(),
    "doSomething"
  );

  res.json(data);
});
What we're doing here is scheduling a job to run in 5 seconds. We are using dayjs to add 5 seconds to the current time. You can see that the job is scheduled and the job details are returned.
Time To Test 🧪
If everything went fine, we should see,
- Job Details in the response.
- A brand new record in the database.
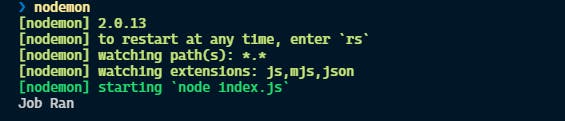
- Terminal output in 5 seconds.
First, run your app with nodemon command. Then you can make a get request to http://localhost:3000/ with any method you want. In this case, I am gonna use Hoppscotch.
Once you have sent the request, if everything is successful, you will receive a response with the job details like this.
{
  "name": "doSomething",
  "data": {},
  "priority": 0,
  "type": "normal",
  "nextRunAt": "2022-03-26T07:38:21.009+00:00",
  "_id": "623ec2e8fdced2c3bd29695b"
}
And if you check your database you will see the created job's record like this

After exactly 5 seconds, you should see the following output in the terminal.
Most importantly the job will persist even if you restart the server. So that is it for the basic Agenda tutorial. I hope you learnt something and I am also planning to do a more in-depth tutorial on how to use Agenda. Let me know what do you think.